

There are many reasons you might need to rely on a stockpile of MREs to feed yourself and your family. Perhaps the grocery store shelves are empty after looting and panic-buying due to the economic depression; or you may have evacuated from your home and must stay fed until you reach your stockpile at your bug-out location; or maybe it’s just a family camping trip.
Whatever the reason, homemade MREs can be the solution. DIY MREs tend to be more affordable than conventional MREs, and you can create them at home with limited ingredients and materials, fully customized to your needs.You can adjust the contents based on dietary preferences or restrictions, allergies, or simply personal likes and dislikes. This degree of customization sets DIY MREs apart from conventional, store-bought versions.
If you possess the DIY spirit and want to learn how to make MREs at home, keep reading. We will provide a simple step-by-step process for making DIY MREs and tips for getting the longest shelf-life possible.
MREs have become popular amongst preppers and survivalists because of their convenience and impressive shelf life. In addition, professionally made MREs have even inspired preppers with the DIY spirit to make homemade MREs.
The Intricacies of MREs: What Makes Them So Special?

MRE stands for “meal ready to eat.”MREs were initially created in the 1980s for the military. Since then, MREs have continued to provide nutrition to military personnel; but MREs have also become popular staples for non-military personnel, especially those interested in emergency preparedness.
MREs have become popular amongst preppers and survivalists because of their convenience and impressive shelf life. In addition, professionally made MREs have even inspired preppers with the DIY spirit to make homemade MREs.
How are homemade MREs different?
As the name states, MREs are ready to eat the second you open the package. They contain fully cooked food that can be reheated or enjoyed at room temperature.
The major difference between military MREs and DIY MREs is the readiness to eat. The DIY MREs we will discuss in this article will require some prep time to consume. Considering that convenience is king during an emergency scenario, the prep will only include heating and adding water.
Essential Characteristics of High-Quality Survival Food

Both military and homemade MREs are survival food. They may not contain the most gourmet food on the planet, but the food they do contain possesses the necessary calories, carbs, proteins, minerals, and vitamins to keep your body fueled.
Besides the food inside, MREs are great examples of survival food because they have four important qualities:
-
DIY MREs are lightweight. If you are on the go, you need food that won't weigh you down.
-
Homemade MREs are compact and packable. Many MREs can fit into your go-bag or prepper pantry without wasting valuable space.
-
MREs have a long shelf life.Everything inside the MREs is individually wrapped, and the entire thing is vacuum sealed to prevent spoiling.
-
DIY MREs are easy to prepare and require little cook time. You will just have to heat up and add water, which is no problem because a small camp stove is part of yourgo-bag essentials.

The Journey of Creating DIY Homemade MREs
DIY MREs are easy to make. However, the process can be more time-consuming than just eating straight out of yourfamily survival food kits. To get started, make sure you have the necessary equipment and materials.
- Vacuum sealer
- Vacuum sealer bags
- MRE ingredients
- A desiccant, such as silica gel packets or oxygen absorbers
- Zip-lock bags
A Sharpie for labeling the MREs
A critical element in the preparation process involves food safety. Proper food handling is a must. Ensure all surfaces and utensils are clean, and always wash your hands before handling food. This will ensure the longevity of your homemade MREs and reduce the risk of foodborne illnesses.
1. MRE Making: Gathering Your Ingredients
The ingredients in your MREs must be able to be eaten raw or “cooked” by adding water. You do not want to include anything that requires refrigeration, like dairy products. Here are some ideas.
|
Suggested Ingredients for Homemade MREs |
|||||
|
Bagged, or canned tuna, spam, chicken, or fish |
Packaged instant rice or potatoes |
Ramen noodles |
Granola, cereal, or protein bars |
Instant oatmeal |
Dried fruit |
|
Candy bars |
Single servings of salt, pepper, parmesan cheese, etc. |
Single servings of sweeteners |
Instant drink mixes, like coffee and electrolyte powder |
Tea bags |
Packaged crackers |
|
Freeze-dried survival food |
Dehydrated fruits and vegetables |
Single servings of hot sauce, ketchup, or mustard |
Beef jerky |
Pre-packaged silverware and napkin(s) |
Packaged cookies |
Using Freeze-Dried and Dehydrated Food
The majority of the food items we included in the table above are individually packaged and processed foods. This is a strategic choice, so your MREs have a reliable and long shelf life. However, you can also use freeze-dried and dehydrated foods in your homemade MREs.

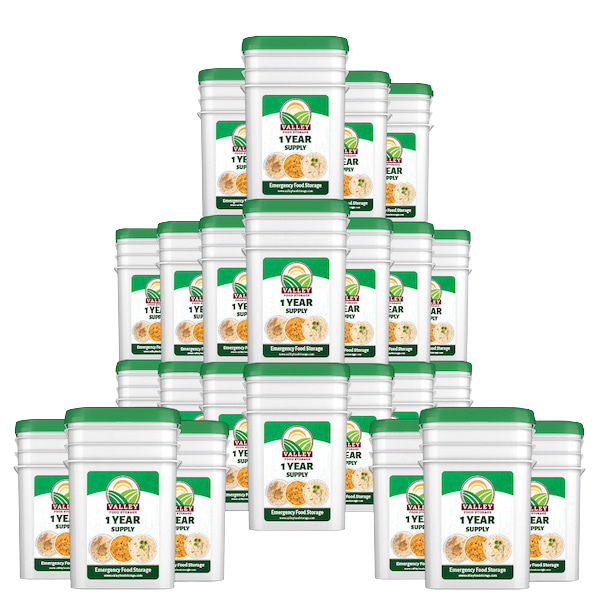
Freeze-dried or dehydrated food fromsurvival food bucketsmakes great ingredients for homemade MREs. They are affordable in bulk amounts and are nutritious. Adding these entrees from Valley Food Storage as your MRE main dish ensures you have some clean, nutritious calories at the base of your DIY MRE.
Simply scoop the appropriate serving size of your ingredient—for example, pasta primavera entree—into individual zip-lock bags and add a desiccant packet. Remove all the air to the best of your ability and add it to the MRE. The vacuum sealer in step three will do the rest.
[product_render product-handle="entree-bucket"]
2. Creating Your MRE Menu
This is the fun part! Arrange your ingredients into meals that you want to vacuum seal. You can create whatever combination of ingredients sounds tasty. Remember to diversify so you don’t eat the same thing every time.
Here’s an example of a beef ramen DIY MRE:
- Entree: Beef flavored ramen with added freeze-dried beef
- Side dish: Instant rice
- Snack: Peanut butter crackers and box of raisins
- Dessert: Tootsie rolls
- Additional ingredients: Tea bag, instant coffee, drink mix, salt, pepper, and pre-packaged plasticware.
3. MRE Vacuum Sealing Process
After you have organized your ingredients into meals that you know you will enjoy, it’s time to use the vacuum sealer. If you have ever used a vacuum sealer before, then you know how simple this process is and how satisfying it is to watch the bag shrink.
Vacuum seal each individual MRE and set them aside for the next step.

Take your time with this step and ensure you get a proper seal on every MRE. You don’t want to find spoiled MREs years later when you’re trying to feed your family during agrocery shortage.
4. Labeling and Storage Preparation for Homemade MRE
Now that you have created a collection of homemade MREs, it’s time to label them and put them away in storage. Using a Sharpie, label the MRE with the date they were created. In addition, we recommend naming the MRE so you can quickly identify what you want to eat; for example, “beef ramen dinner” or “oatmeal and fruit breakfast.”
Once they are labeled, your MREs are ready for storage. We recommend following the tips in the next section to ensure you get the maximum shelf-life possible for your DIY MREs.
Suitable Environment For Your MREs
One of the most significant aspects of long-term storage is the environment. Maintaining a consistent and suitable environment for your MREs is crucial to preserving their quality and longevity. Therefore, always ensure that the storage area is free from pests and is not susceptible to extreme weather changes.
Extending the Shelf Life of Your DIY MREs
Once you have prepared a stockpile of custom homemade MREs, it will be time to store them. To ensure that your MREs stay fresh for a long time, you cannot just dump them into a bag and leave them in the basement. Instead, we recommend following these simple guidelines to extend the shelf life of your MREs:
-
Keep your homemade MREs in a cool, dry, and dark location that does not experience extreme temperature changes.
-
Store your DIY MREs in another container, like a food bucket, Pelican case, or footlocker.
-
Wherever the storage location is, take precautions against rodents and other vermin that could chew through your MRE packaging. For instance, set out some traps in the basement beneath the shelving unit where your MREs are cached.
-
Store your MREs off the ground to protect them fromflooding, insects, and rodents.
-
Refrain from freezing your homemade MREs. Remember, nothing you included should require refrigeration anyway.
- Periodically monitor your stockpile of MREs. Whenever necessary, rotate old MREs out and package new ones to replace them. If there is no emergency, just take the old MREs camping or to a picnic in the park.
Simpler Alternatives to Homemade MREs

We understand that making homemade MREs might not be for everyone. So, for the folks who like the idea of having pre-packed meals but do not see themselves creating custom MREs, have no fear—there are alternatives.
One obvious alternative is to purchase conventional MREs. However, you might not like the flavor of MREs or the preservatives included in them.
In this case, your best bet may besurvival food supply kits. These kits are comprised of freeze-dried and dehydrated foods that are ready to eat when you are. They have an impressive 25-year shelf life and come with simple, clean ingredients.
Wrapping Up: The Importance of Homemade MREs
MREs are no longer only used by military personnel. MREs have also become important components in emergency preparedness plans for survivalists and preppers, due to their long shelf lives and convenience.
What's more, particularly self-reliant preppers with a strong DIY work ethic have replaced conventional MREs with homemade MREs to cut down on costs and have more control over what they’re consuming during emergency scenarios.